
Once you have all of your materials together we are going to need to make some basic parts. Take one stack of clay gravel and sand and drop all of them into a crafting table side by side. It doesn't matter which order they are in just as long as they all are all in there at the same time. This recipe makes two grout per one sand gravel and clay. Once you craft all of your clay sand and gravel into grout you should have 176 grout. Now drop the grout into a furnace and cook it up in order to make yourself some seared brick. Great now we have the essential building blocks for our smeltery. Let's head over to our crafting station and make the final components for our smeltery.


The first block we are going to make is the smeltery controller. This block is the brain of the smeltery and once everything is put together will act as the primary user interface. In order to make a smeltery controller you need to put seared brick in a square on the crafting grid just like you would if you were making a chest out of wood and there it is. It really is that simple! :)

Now we are going to make ourselves a seared tank. The seared tank is a liquid container that can be used to store fluids such as lava and molten metals, when picked up it will not lose it's contents. This block is going to be used as the fuel intake for the finished smeltery. In order to craft a seared tank you will once again put seared brick in a square but this time you will put one piece of glass in the center.

Now we are going to make three smeltery drains. The smeltery drain is used to siphon the molten metal out of a smeltery using a seared faucet. In order to make one you simply make a line of seared brick on the left and right hand sides of the crafting grid.

Now we need three seared faucets. These will connect to the smeltery drain and when right clicked allow the molten metal in the smeltery to flow out. In order to make one you simply put 3 seared brick into the crafting table in the shape of a v just as if you were making a bowl or bucket.

Next up is the casting table. The casting table has two primary functions. It allows you to make casts out of your stone tool parts and it allows you to use those casts to make make metal tool parts. We will go into this further next time. For now let's just get our smeltery off the ground. In order to make a casting table we are going to put three seared brick across the top of the crafting grid and two down each side, much like you would if you were making a pair of pants.

Now we need 2 casting basins. These will allow us to drain off our molten metal and make easy to store metal blocks. In order to make them you will simply place 3 seared brick across the bottom of the crafting grid and two on each side just as if you were making a cauldron.

Now take the rest of your seared brick and place them in the crafting table in a square of 4. This makes seared bricks and will simply add size and structure to our smeltery. Remember the larger the smeltery the more ore you can smelt at once.

Finally we are ready to build our smeltery! You are going to want to have a good little bit of space since this structure is going to be six blocks across at it's widest point. Once you have a large enough space set up, carve out a 3x3 space in floor wherever you want the center of your smeltery to be. Fill this 3x3 hole with seared bricks. This is your smeltery foundation.

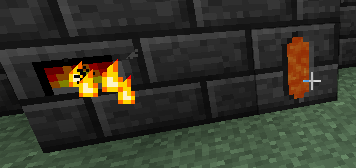
Now put your smeltery controller on the block directly in front of what would be the front left square of your foundation, now place your seared tank directly in front of what would be the front right corner of your foundation, fill in the space between the controller and the tank with seared bricks. now staying directly on the edge of your foundation make the sides of your smelterly. This should take three seared bricks for each side and should look like a square with it's corners cut off when you are finished. If done correctly your smeltery controller should have little flames in it.

Now choose which side you would prefer your main work area to be and place your three smeltery drains across the top level of that side, make sure the holes in the drain are pointing outward. Now put one faucet on each drain hole and then put one casting basin under the left hand faucet and one casting basin under the right hand faucet. Finish off your work area by dropping your casting table between the two basins. The top of the other 3 sides of your smeltery with the rest of your seared bricks. Congrats you have finished your smeltery!

In order to smelt metal you will need to fill the seared tank in the front of your smeltery with lava by right clicking on the tank with a bucket of lava. The seared tank will hold up to four buckets but will work just fine if you only have one.
Now that you have some lave to fuel your smeltery right click the smeltery controller to open up the user interface. On the right hand side you will see an orange bar, this shows you how much fuel your smeltery currently has (if you have just added fuel the interface may not reflect it yet as it takes a bit to update). One the left hand side you will see a bunch of squares. This is where your ore goes. You can put ore in one at a time ore simply hold shift and left click on the ore in your inventory to put in as much as the smeltery has space for. The middle part of your smeltery controller displays what molten metals are currently in your smeltery. It also allows you to switch between which metal is currently active when you have more than one in your smeltery by simply clicking on the metal you wish to use.

That does it for today's tutorial. Drop by tomorrow and we will go into making some basic alloys, casts and some cool new tools using a toolforge!
Until Then!
<3 LK
No comments:
Post a Comment